Well, thanks to you all for the compliments! Here's a tutorial, not many pics of the process cos I didnt expect anyone to want it.
1. Cut out a rectangular piece of leather to wrap around the flask. Rather a bit too large then too small.
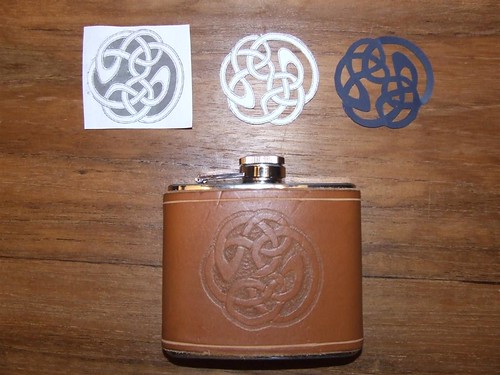
2. Decide where you want the pattern and how big.
3. Print the pattern, cut it out and transfer to a plastic sheet.
4. Mark out the pattern on the leather with a non-waterproof marker pen, so you can wipe away the lines after embossing. Cheap gelpens are good.
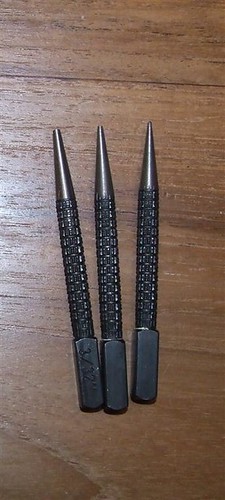
5. Dampen (put moist cloth on it for half a minute) the part where you want the pattern, and start embossing. I used awls of some kind (used to strike little holes in wood I suppose, bargainstore), and grinded the point flat with a Dremel. Then start tapping in your design with this awl and a hammer.
Here you can see the result up close:
6. When finished, let it rest for a while, so you can see what embossed parts come back up and need some more persuasion. Wipe away pen lines.
7. Dampen again and neat out the inner and outer lines with a big blunt needle or nail.
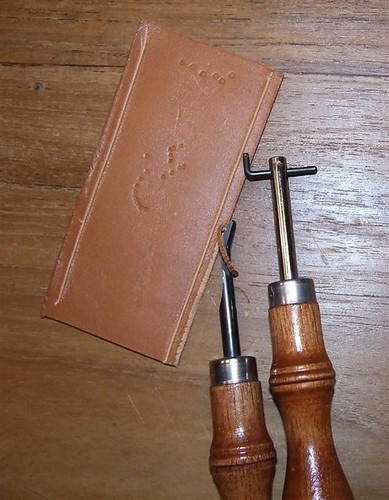
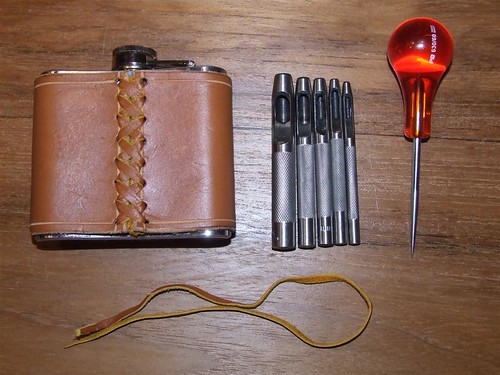
8. Use a stitch groover (upper item) to decorate the sides. Use an edge beveller to smooth the edges.
9. On the 2 end parts that will come together with lacing, make a few holes with the little tools of which I do not know the English name (center punches it is, thanks Jedadiah). I used the smallest. The big awl is for opening up the holes just prior to lacing.
10. Wrap the leather around the flask and submerge the lot in hot water for 5 seconds. Now soft and pliable, you need to hold the leather in place with some soft, broad cord. (Thin cord will cut into the leather when wet.) Let it dry for 15 minutes. Leather will still be soft enough to make lacing easier, but it will keep the form of the flask pretty well.
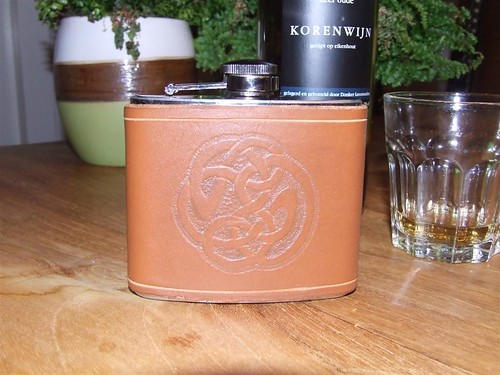
11. Take of the leather wrap and lace the ends together. Check for sizing between each hole. Put a small knot in the last lacing, add a drop of glue to secure it. Slide in flask and youre done. You could wax/oil/paint/etc. the leather if you want, I left it natural.
12. Buy some nice spirit, pick a cold day as an excuse for a little "nippy sweety" an enjoy!
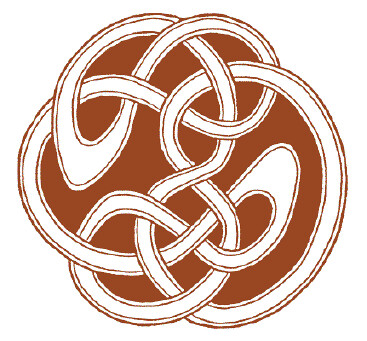
PS: I've got some Celtic patterns from the internet. PM me if you want them.

 Some details of the process would be great, I want to try celtic knots and bands in leather sometime soon