First try at spoon carving - critique and tips please

  • Hey Guest, Early bird pricing on the Summer Moot (29th July - 10th August) available until April 6th, we'd love you to come. PLEASE CLICK HERE to early bird price and get more information.

bobnewboy

Native
Jul 2, 2014
1,296
849
West Somerset
Hi All,

I found myself with some free time on Sunday, and it was a nice day out, so I thought I would make my first attempt at spoon (or any :) ) carving.

I already had the Robin Wood right handed compound curve spoon knife, and a Mora 106. I also had a piece of green sycamore branch, which while quite narrow would have to do for my first go.

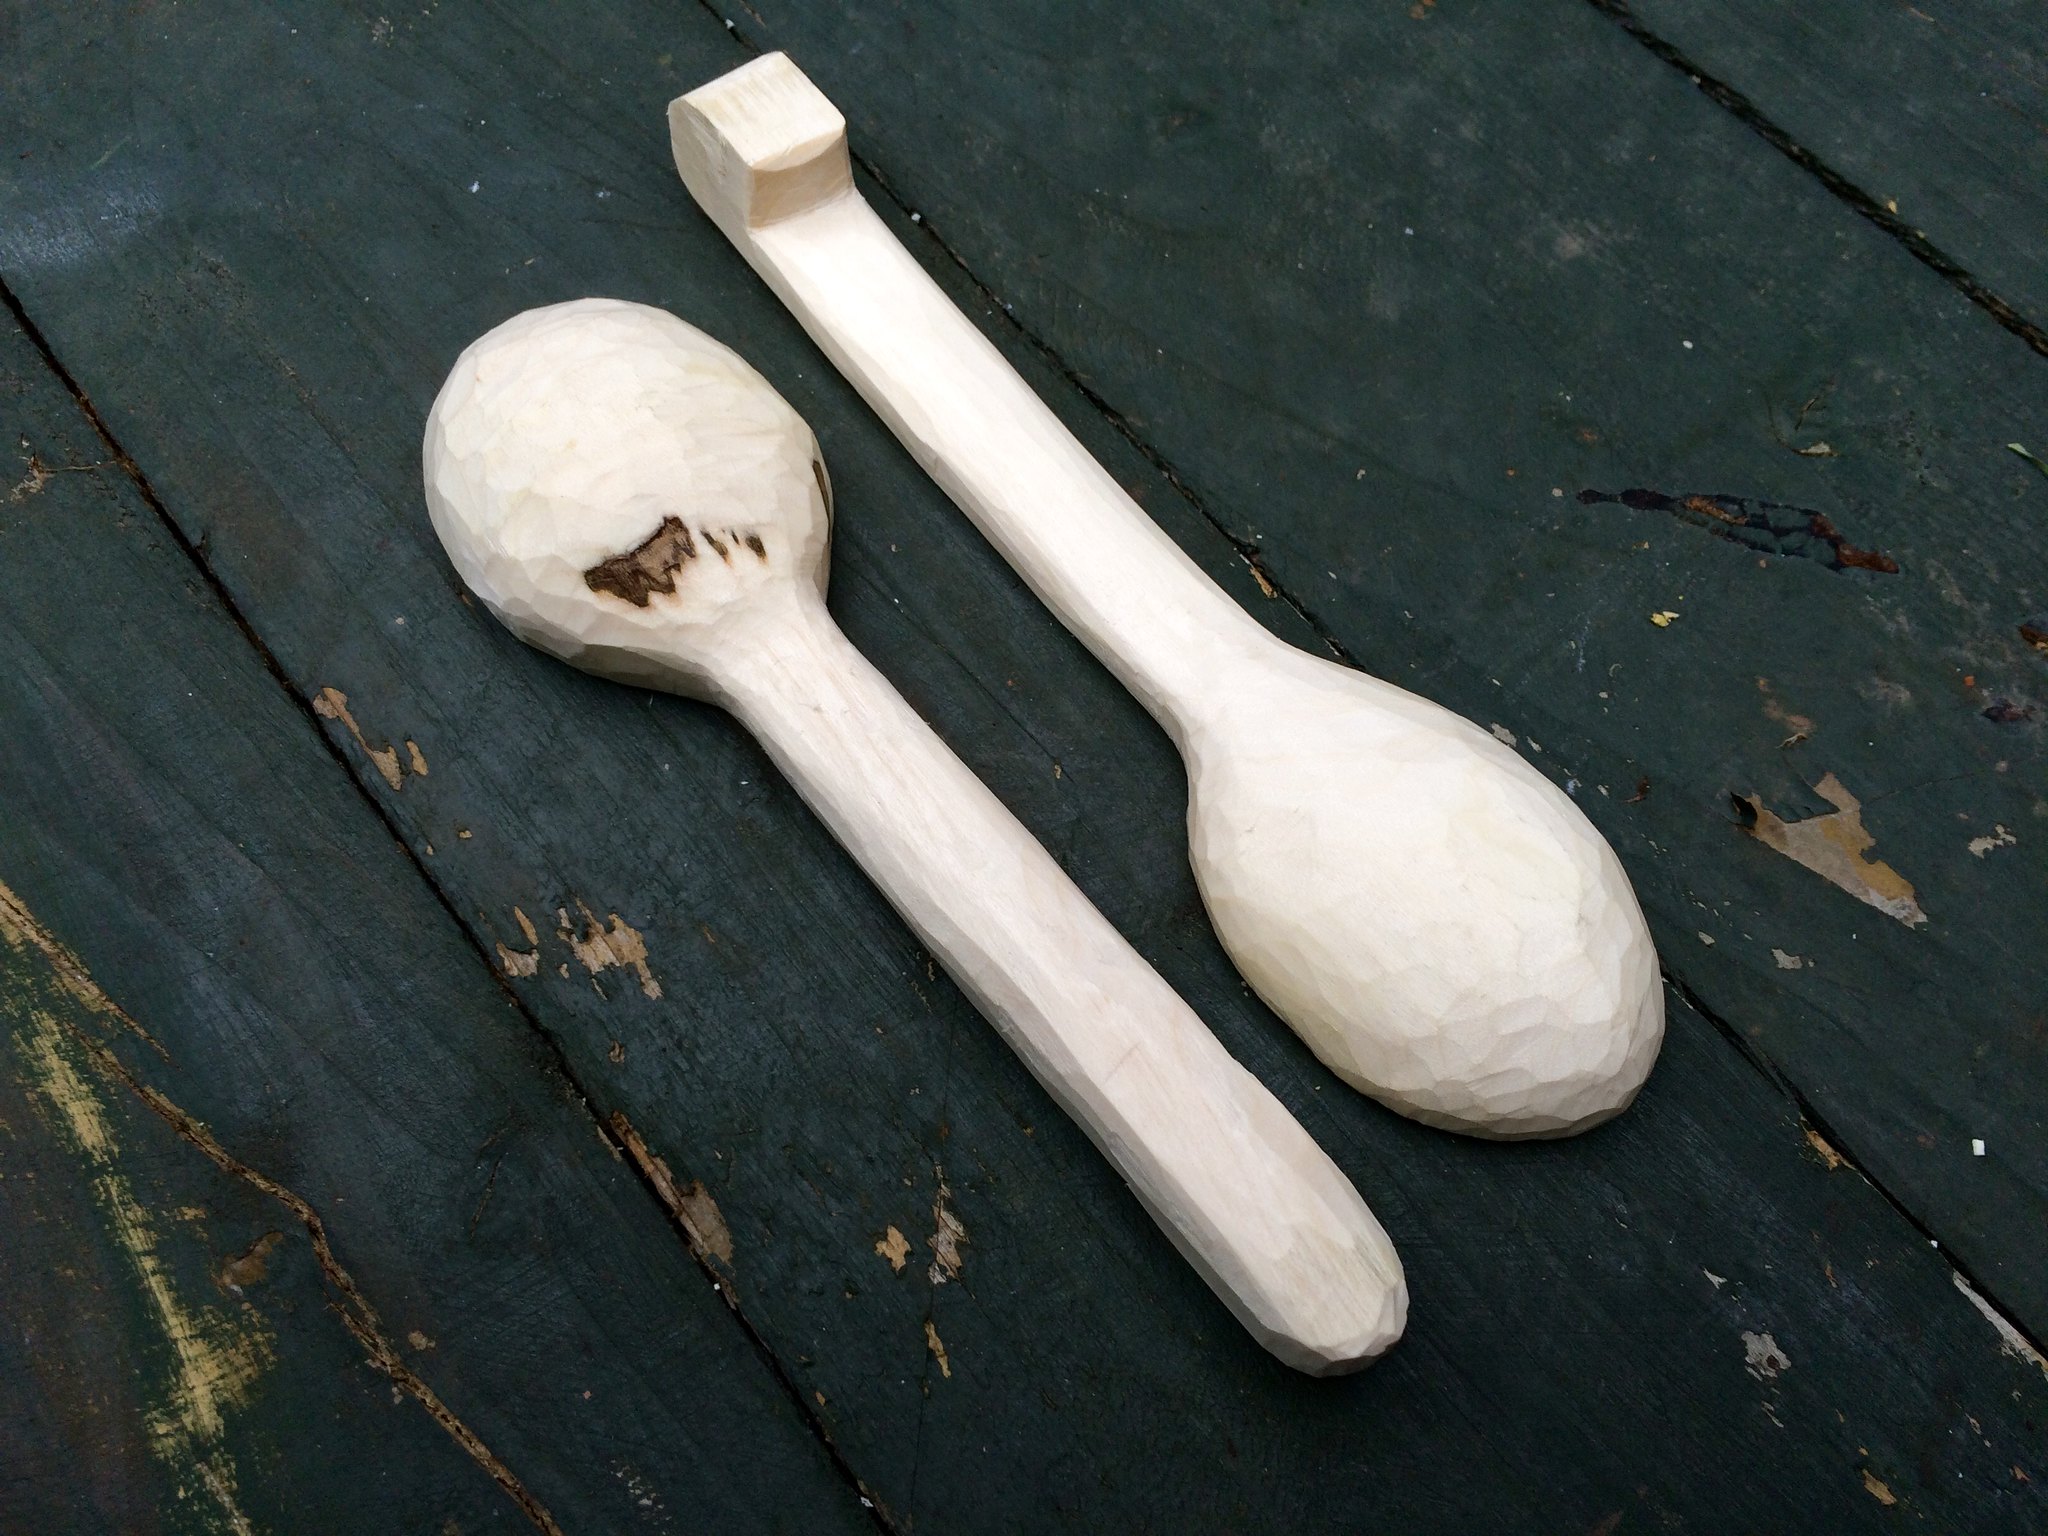
The first one came out reasonably:

22273892895_c8c68c141d_k.jpg

21652863463_8cc41dd79d_k.jpg

21651160694_6f9ffaa0c1_k.jpg


...but I am having a little trouble getting the inside of the bowl to be smooth, and also I find that I cut the outer lip quite often. Perhaps I need a bigger piece of wood?

Anyway, with a reasonable result, I thought I'd have another try with the other half of the cleaved branch, and I ended up with (on the left):

22090053608_e5bc848df2_k.jpg

22251762396_793a59b1c0_k.jpg


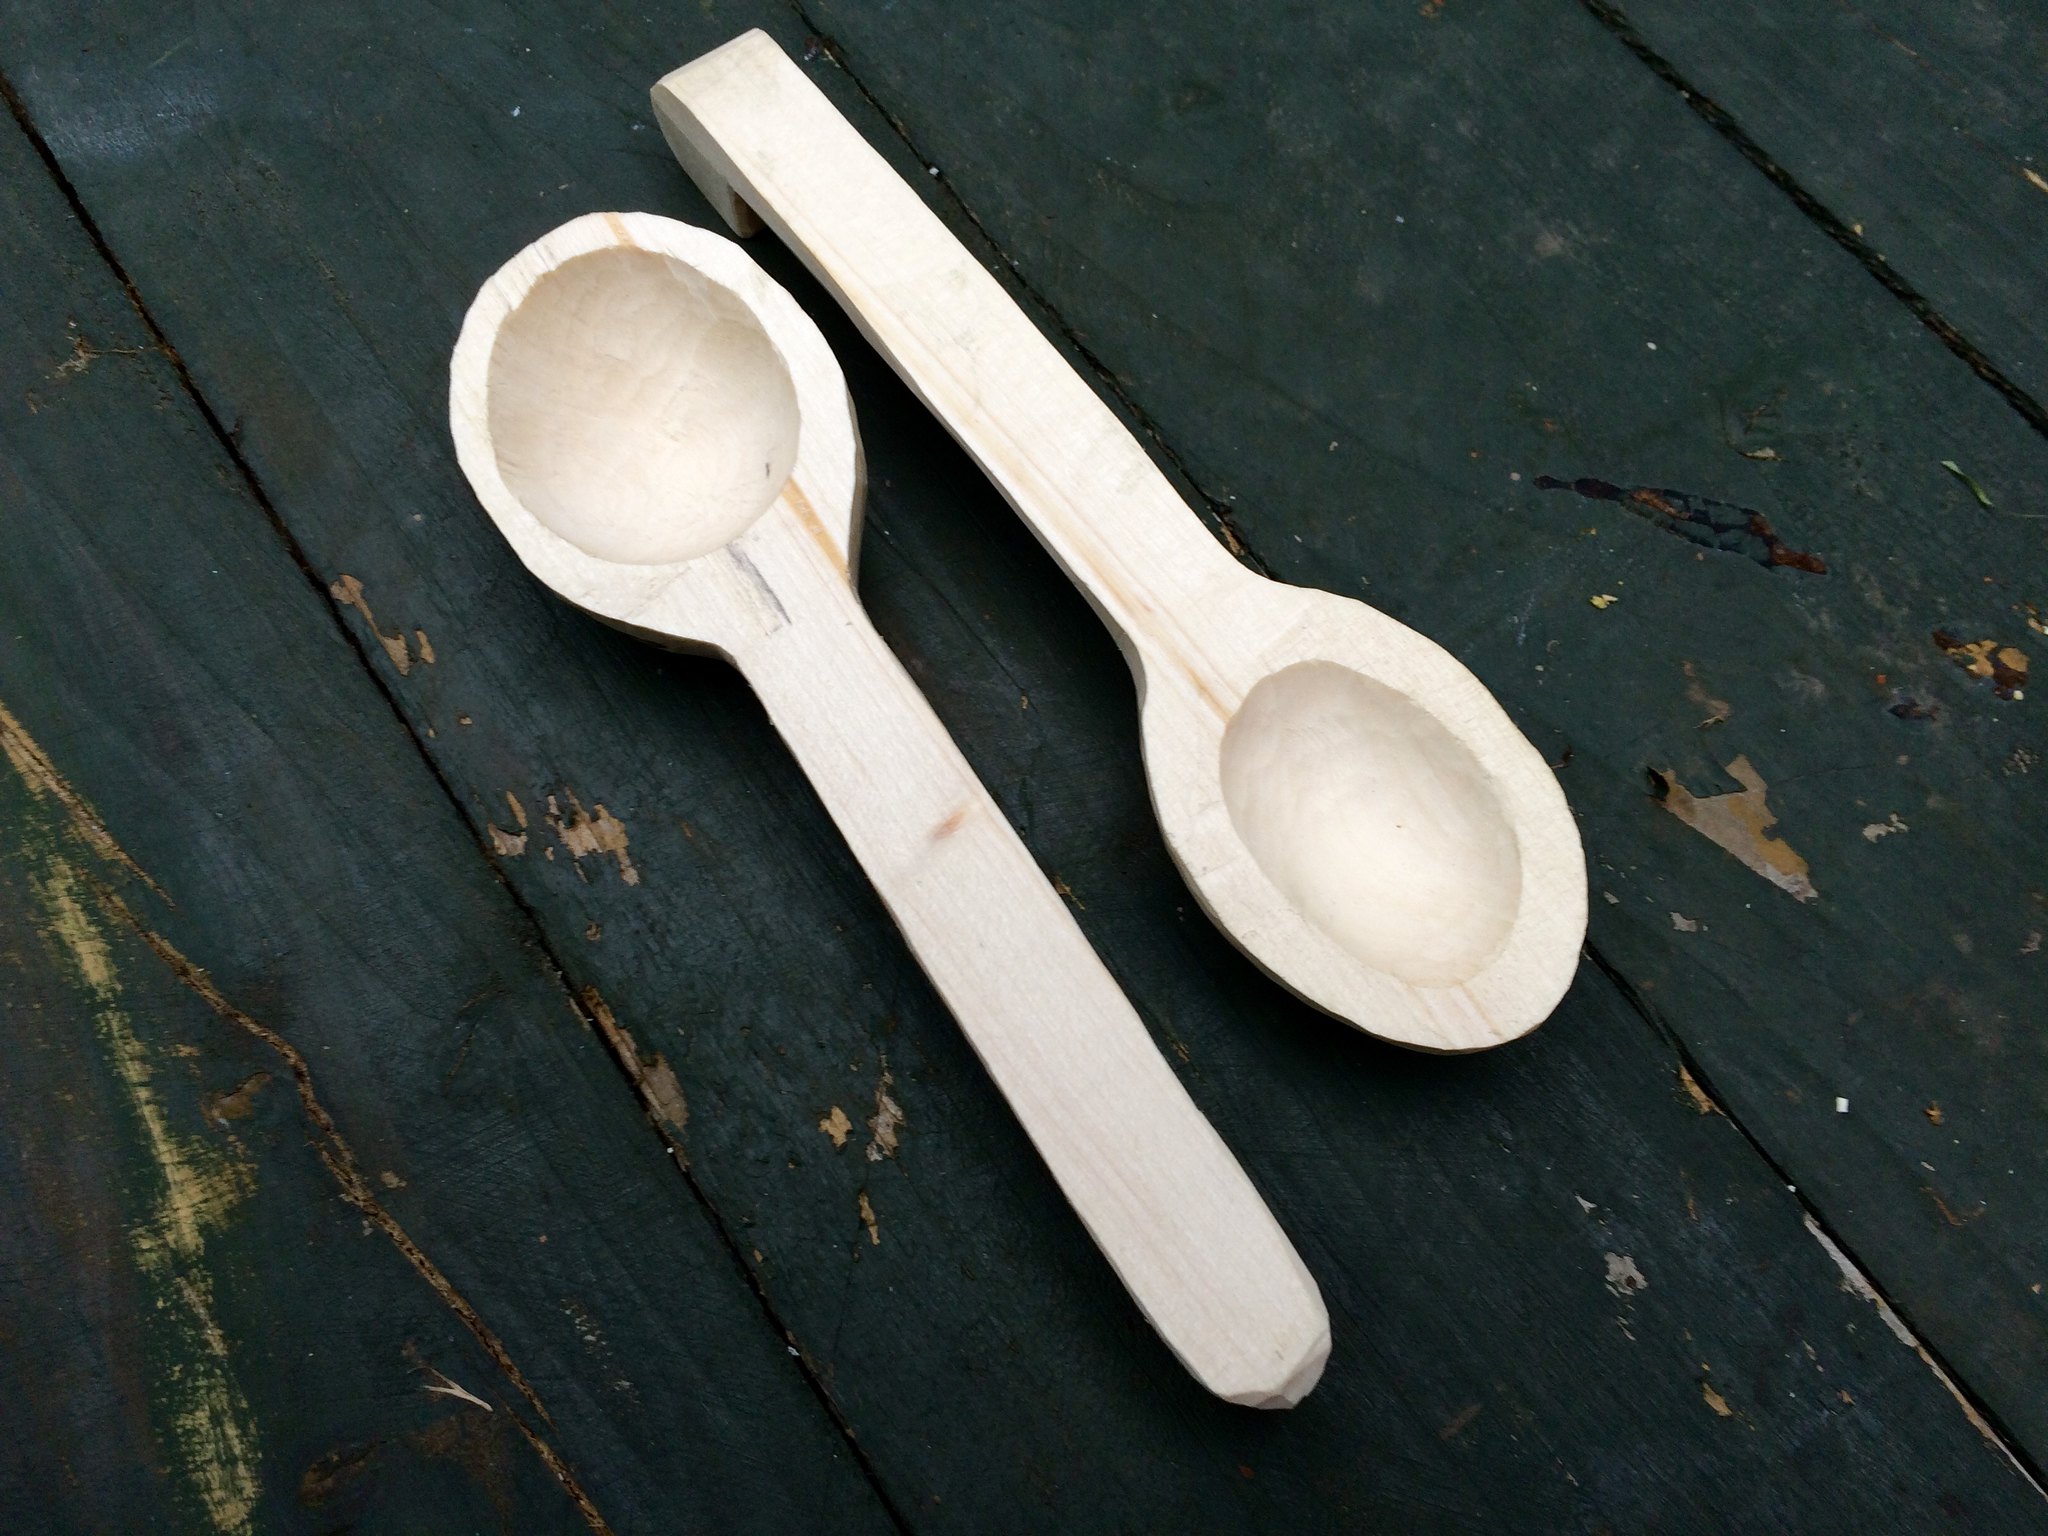
In that one, the bowl is much deeper and a bit bigger, but I managed to get a better finish inside the bowl. As I understand it, it should be possible to get a smooth-ish finish with just the knives, but as you can see my results were a little bobbly. Is there a technique for getting a clean finish with a blade?

Thanks in advance for any handy tips......
 
Last edited:

mrcharly

Bushcrafter (boy, I've got a lot to say!)
Jan 25, 2011
3,257
44
North Yorkshire, UK
I find it hard to get a smooth finish with green wood - you need a delicate touch, take off shaving thinner than paper. Or let the spoon season for a few days then do the finishing.

As for the lip; that needs a delicate touch and a careful eye on the grain direction. It becomes very easy to break out chips rather than cut off shavings. Try to always work across the grain - this can be hard when cutting at the end of the spoon.


You have a nicely even shape there, get bold about how thin you go.
 

Robson Valley

Full Member
Nov 24, 2014
9,959
2,665
McBride, BC
For a first 'go', good spoons.
Several things come to mind:
1. As mrcharly notes, let the spoons dry for a few days or longer. Most woods stiffen up and that should make the tool mark ridges easier to scrape away.
2. You need a fine bright light to make hard shadows so you can really see what to cut.
3. You need another knife. One with a much shorter radius so it cuts the ridges, one at a time, without digging into anything else.

Take a look at the Mora/Frost #171 Equus farrier's knife. They have a progressive sweep/radius to the hook-like scorp at the tip.
If you don't want to buy them new, find your local farrier and see what they may be keeping as "worn-out" tools.
I use about a dozen of these, old and new, various brands, most with handles of my own making.
With the bevels revised to 12 degrees, it's remarkable as they cut in very tight spaces.

4. Consider thinning the lip of the spoon bowl. It's an optical illusion which makes the bowl part seem much lighter and more delicate.
5. Don't be upset if you ruin a few = takes a while to "learn the wood."
 

Herbalist1

Settler
Jun 24, 2011
585
1
North Yorks
Hey Bob,
li don't hink that is at all bad for a first try. You've got good symmetry in the shape of the spoons which is more than I did first time. I'd say you could use these to get a bit more practise in, thinning out the bowl and rounding off the sharp angles. I really wouldn't worry about getting the inside of the bowl smooth at this stage. Also its no crime to finish off with a bit of wet and dry - I'm sure there are some spoon purists who would disagree but if it helps you get a finished product you're happy with, it will encourage you to carry on and you'll improve as you go.
In the end it all depends on what you want to achieve - there are some guys on here who have taken spoon carving into an art form with some truly beautiful results, certainly way beyond my efforts. Others are happy to be able to quickly make a useable item while they are out and about with what they find at hand - both are worth while (and some guys can produce beautiful items quickly with what they find at hand, not that I feel bitter). If you end up with a useable item on your first go - and clearly you have, that's a great result.
 

Chris the Fish

Forager
Dec 5, 2009
145
0
Stoney Stanton, Leics
Great stuff, keep going and as the skills improve so do the spoons. I find that if you start with a few tools you get to know them and you can become proficient in getting your desired result using them. Keep it up, it's very addictive :)


Sent from my iPhone using Tapatalk
 

Stew

Bushcrafter through and through
Nov 29, 2003
6,454
1,293
Aylesbury
stewartjlight-knives.com
3. You need another knife. One with a much shorter radius so it cuts the ridges, one at a time, without digging into anything else.

Take a look at the Mora/Frost #171 Equus farrier's knife. They have a progressive sweep/radius to the hook-like scorp at the tip.
If you don't want to buy them new, find your local farrier and see what they may be keeping as "worn-out" tools.
I use about a dozen of these, old and new, various brands, most with handles of my own making.
With the bevels revised to 12 degrees, it's remarkable as they cut in very tight spaces.

No he doesn't. It may be you not seeing on the picture correctly but that blade has enough sweep to be fine. I have one myself and they have a better curve than the farrier knives I've had.
 

Macaroon

A bemused & bewildered
Jan 5, 2013
7,209
362
73
SE Wales
No he doesn't. It may be you not seeing on the picture correctly but that blade has enough sweep to be fine. I have one myself and they have a better curve than the farrier knives I've had.

I agree, his tools are good and so is his work, very good for a first go; he's got all the essentials very well and just needs to practice. (Don't we all?)

@bobnewboy; Sorry for referring to you in the third person, matey. My advice to you would be to use what you have, those are perfectly good tools and it's very easy to over complicate things. Don't be afraid to leave work out of your hand sometimes and move on to something new, just keep doing as much carving as gives you pleasure and you'll pick it up very quickly if these first two are anything to go by.

I've often picked up a spoon or a bowl I made a couple of years previously intending to use them, and for some reason I suddenly realise exactly what it needs to finish it completely, so I take the knife to it and am then happy. :)
 

Robson Valley

Full Member
Nov 24, 2014
9,959
2,665
McBride, BC
Stew: I looked again. I can see the progressive sweep that should do the job as the wood dries a little.
Smoothing cuts for finishing have to be the most tedious.
The OP invited comment so I made mine with some experience carving spoons (70) and forks (30) for sale.
I've long since posted pictures of that.

Unless there's a driven requirement for minimalist equipment that I have never seen, a couple of extra tools
can turn a frustration into a pleasure.
 

bobnewboy

Native
Jul 2, 2014
1,296
849
West Somerset
Hi All,

Well, many thanks to all for the feedback! :)

Regarding the tools, I dont need too much encouragement to buy more, but I have set myself the challenge to do what I can with the tools that I have so far. In going from the first to the second spoon, I made some changes in the way I was holding and cutting the piece, and noticed an immediate improvement in the depth and quality of cut with the spoon knife. That includes managing to avoid the opposite edges of the bowl with the rest of the blade while using the tighter curved end. The slightly larger bowl size of the second piece can only help too! The knife itself is made with a compound cutting curved edge which varies from a wide to a narrow curve over it's length. I took a couple of pictures to illlustrate this and they are here:

22152249918_f40db58883_h.jpg

21717215264_b330e897cd_h.jpg


It goes without saying that both the spoon knife and the Mora are sickeningly sharp (not yet stropped by me) and both bite into the green wood in a very pleasing way. In fact it is the sharpness combined with the slightly wet wood (cut a week before working it) which probably means that getting a finer cut for finishing is difficult to achieve. So, as advised, I shall wait for a week or two for the spoons to dry a bit before trying finer cuts to finish them a little more.

Robson, I can see that a good strong light will help when it comes to making finer cuts. It certainly helped to be out in the sunlight when starting. I can also see that I need to do some more work in thinning the lips of and general thickness of the bowl, but I guess that is just a matter of confidence. I am used to gauging the thickness of wood with my fingers from my bowyery.

Macaroon, I like to make things and agree with you about putting things down after a certain time. My overall way of working is to make a thing (leather, knives, bows, arrows, spoons now :) ) and then to get to a point where I am happy with it. Then a little later I make another and set my own goal for the result a little higher each time. As time goes by my making skill hopefuly improves and I look back at the early pieces as a history lesson to myself - illustrations of what I did wrong, what I did right, and where I improved. So my friends and family end up with a selection of things that they maybe did not expect as presents :)

Of course the issue now will be finding pieces of green wood that are a bit (or much) bigger. I would very much like to make some more spoons, maybe make a kuksa or voyageur's noggin. I will have to make friends with some more landscape gardeners and foresters!

Thanks again all!

//Bob
 

mrcharly

Bushcrafter (boy, I've got a lot to say!)
Jan 25, 2011
3,257
44
North Yorkshire, UK
A big aid to gleaning wood is a pocket-sized pruning saw (I have an Opinel).
It's not uncommon to find fallen branches on or beside footpaths. You are doing everyone a service if you clear them back, just take the usable bits for yourself.
 

Tiley

Life Member
Oct 19, 2006
2,364
374
60
Gloucestershire
Those are a great start: my first effort was a mildly shaped club that I could, with a certain amount of effort, fit into my mouth.

Others have already proffered advice. I would add that, if it is a spoon for eating, do not make the bowl of the spoon too deep, else it'll not be particularly comfortable in use. Your top lip should be able to touch the inside of the bowl for its entire length. If you can achieve these things, then you'll have something that is really elegant and, above all, practical.

Good luck and keep up the good work!
 

Ferret75

Life Member
Sep 7, 2014
446
2
Derbyshire
Those are a great start: my first effort was a mildly shaped club that I could, with a certain amount of effort, fit into my mouth.

Others have already proffered advice. I would add that, if it is a spoon for eating, do not make the bowl of the spoon too deep, else it'll not be particularly comfortable in use. Your top lip should be able to touch the inside of the bowl for its entire length. If you can achieve these things, then you'll have something that is really elegant and, above all, practical.

Good luck and keep up the good work!
Mine were a bit like yours Tiley, I always made the bowls too deep, great for picking up baked potatoes, or possibly as a trowel! If you look at a metal spoon they are actually really quite shallow.

Sent from my Nexus 7 using Tapatalk
 

humdrum_hostage

Full Member
Jul 19, 2014
771
2
Stradishall, Suffolk
Great start mate. I always found the wood is always thicker in the bowl than you expect so there is always room for a little more to come off. I dont think i have ever seen someone carve a spoon until they have gone through it.

Another thing that I found improved my skill immensely, which I picked up in an email conversation with Mr Budd, is that you should be "slicing" through the wood with your crook knife, just like you would with a normal knife not forcing it through like a chisel. Once you start carving next just give it a bit more of a sweep as you go through the wood and it becomes so much more easier and pleasurable to do.

Hope that makes sense???

My first piece wss a kuksa and it never even got finished, but it helped me improve on the next project.

Chris
 

Robson Valley

Full Member
Nov 24, 2014
9,959
2,665
McBride, BC
bobnewboy. Post#11. Thanks for the pix = Fly at it! the progressive sweep is all you need.
As humdrum suggests, a sideways skewed cut will go through any wood far better than a simple "push" into the grain.
You can pull the blade in a skewed fashion to spall off the finest of shavings for the finish.

Me? I don't care, I want my spoons and forks to show some tool marks.
We are FLOODED with Pacific Rim crap. Boatloads of it. I will never sand a carving.
How many spoons has Mr Budd carved? He gets my vote for top quality advice.
 

Dean

Mod
Mod
Jan 24, 2004
888
125
44
South Wales
www.facebook.com
You should be happy with them both, there has been some excellent advice give from folks here so all I will add is "Time and patience will be your friend" and Strop your tools before and after carving.
 

BCUK Shop

We have a a number of knives, T-Shirts and other items for sale.

SHOP HERE