How to Article
Woodspirit carving tutorial
Hi 🙂
after my last woodspirit carving several members asked if i could do a tutorial on how i do them. be warned, mine are not your conventional happy little faces! i try and replicate the traditional nature of a woodspirit as told in folklore.
i hope you enjoy this pictorial walkthrough, and if it inspires you to have a go then that will be brilliant! 😀 (dont forget to post them up)
pics are not the best, but you get the gist. any questions just post up or pm, be glad to help.
atb
steve
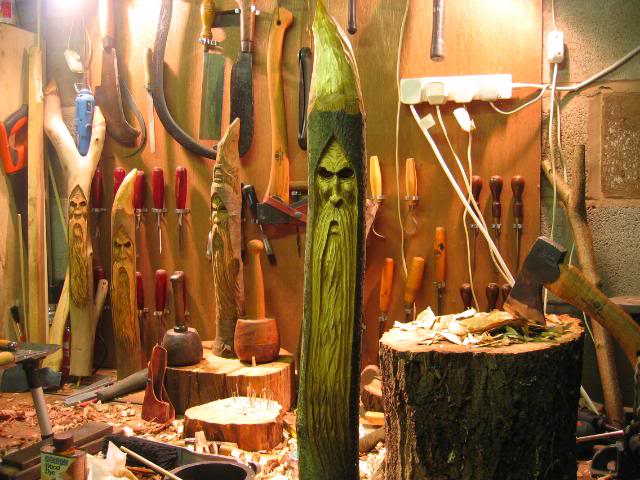
ok just to set the scene here is my little workshop.

these are the various carving tools i use, a selection of Flexcut veiners, v tool and gouges. these along with some Flexcut detail knives are all i need to produce a spirit.

for finishing and tidying i have a few Dremel type bits.

i selected a piece of lime ive had drying under the bench for about a year no cracks, all good! its 2.5″ x 25″

next i figure out where the face is going to be, check that there are no knots in this area, as you dig in it will show as a black dot, the last thing you want on the end of his nose!

what i do now is outline where the bottom of the cowl is going and outline the face area with a v tool

once ive done that i then take off the bark and cambrium layer right down to the lighter sapwood

go around the edges again with the v tool to clean them up, removing any bark hairs

take a pencil and lightly draw the bottom of the eyebrow along with the bottom of the nose, check that its in proportion to the area you have cleaned

ok were ready to do a bit of carving! using a small veiner take a light cut to shape the top eyelid, give it a bit of shape to liven it up and make him scowl! 😀
then do the same for the nose outline, make it wider than you want to allow for shaping

right step back and have a squint, if its not quite right alls not lost at this stage, you only gouged lightly. if your happy with it, start gouging the eyes out. start small and enlarge to suit, you cant put it back!

once your happy with the size and proportion you can start to form the cheeks, always work from the highpoint of the cheek out to the edge, if you gouge towards the centre you will probably take off more than you wanted to which means everything will have to go deeper to get it back :rolleyes: use a medium spade gouge for this

at this point make a start on giving the nose some depth, but keep well away from your outline, allow for curving the nose later. use a small veiner for this

go back to the eyebrows now and mirror the shape you have cut for the top of the eyebrow, dont make them too thin you can always shape them up later. once again a small veiner does the job nicely 😮

if your happy with the shape then remove the sapwood to form a forehead, remember to put a slight curve on it.

check the profile to make sure you have gone deep enough.

clean up and get more depth around the nose, a small veiner should do the trick

once again check the profile

its time to give him a little age now! a small veiner and v tool will put years on him :D.

now we need to extend his beard a little, as before use the v tool to form the outline.

remove the bark and cambrium layer to the sapwood and pencil in the shape of the moustache.

using the v tool take a small groove out, stand back to see if your happy with it.

start removing the wood from inside the cut forming the bottom lip and a suggestion of a chin, remember to work from the centre out to prevent snagging.

from profile you can see the effect you want, the chin vaguely visible.

now spend a little more time in bringing that lip and chin out, this is where the abrasive dremel bit comes in handy
😉

were getting somewhere now, give it a clean up to remove any loose tags and hairs.

right before we get his beard stained or chipped, lets have a go at his hood. time for the kubben! 😀

give it a bit of a twist, you dont want it to look like a traffic cone on his head! :rolleyes: we can smooth it with a large spade gouge.

now we can extend that beard outline, use the v tool to give it a little twist as it goes.

ahh, time for a coffee…:D

take it down to the sap wood, but dont go right down to the end, and gradually ease into the bark to leave a chamfer.

now the interesting bit, give him some hair! with the large veiner take it snake like almost to the end of his beard twisting and turning as you go. then do the same with the smaller veiner criss crossing the deeper ones, finally take the v tool and continue the cuts out to nothing, this will form hair ends, remember when you do the moustache it all radiates from under the nose. it’ll look odd otherwise :rolleyes:

another clean up of any loose bits, take a close look at him now this is your last chance for any alterations prior to staining or linseed oiling.
i usually just put one coat of light oak stain on, but its a personal choice. i also use a heat gun to dry it of quickly, then i will use a medium grit paper to rub over the highpoints, this will produce highlights and lift the appearance


now i know he looks a mean old git already 😀 but he needs some eyes to really get the effect! this is a bit fiddly, gouging so deep its difficult to form eyes in the conventional way, so i use another method.
with a felt tip mark in his eye socket where the centre of the eyes will be, this is critical it needs to be right! drill two holes in his eye sockets the same diameter as your dowel. cut and shape a piece of dowelling to make a half round on the end, the size depends on the workpiece. drill the centre to create a pupil then cut off 20mm a dab of wood glue on the end and fit it in the socket.

makes a difference eh? :rolleyes:

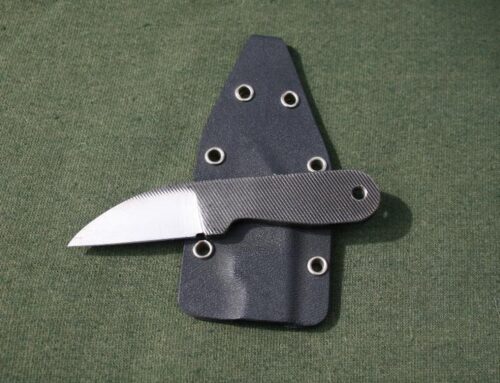
one last job, give the sharps some attention…

and the finished woodspirit… time taken about 3 hrs 🙂


Leave A Comment
You must be logged in to post a comment.